This is the conclusion of a three day lesson applying right triangles. Here is day 1 and day 2. Eric is my apprentice teacher and he initiated this discussion:
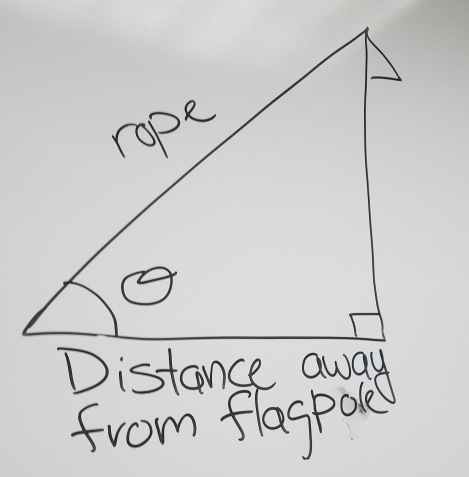
Eric: Where is the angle? Here or here? What else did we find?
student: The height of the flagpole.
student: The distance away from the flagpole
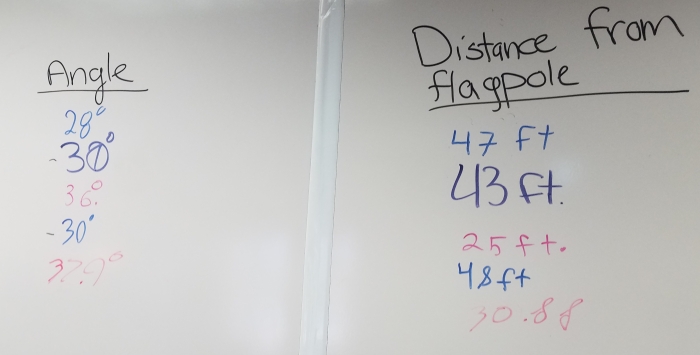
Eric: One person from each group come up to the board and write your angle and distance from the flagpole on the board.
Eric: Let’s make a plan before we go outside.
We then discussed and agreed that we should actually measure the height of the flagpole when we put barbie on the pole. We also decided to find the exact ground distance to create a 30 degree angle, but that it looks like it should be approximately 45 feet from the base of the flagpole. Students also agreed that they would like to confirm their thinking that this angle will result in a safe speed for Barbie to zipline down from the top of the flagpole.
The Wrap Up
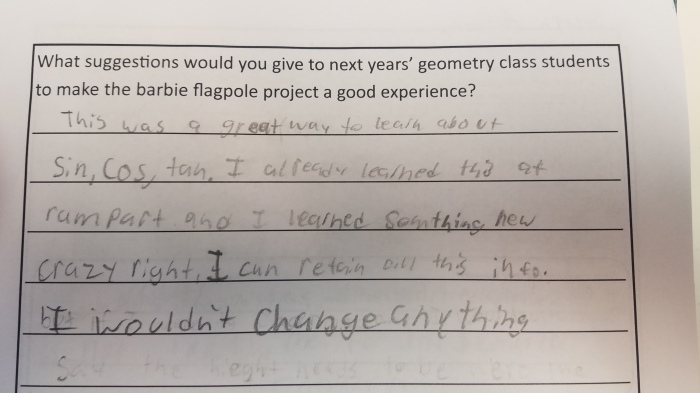
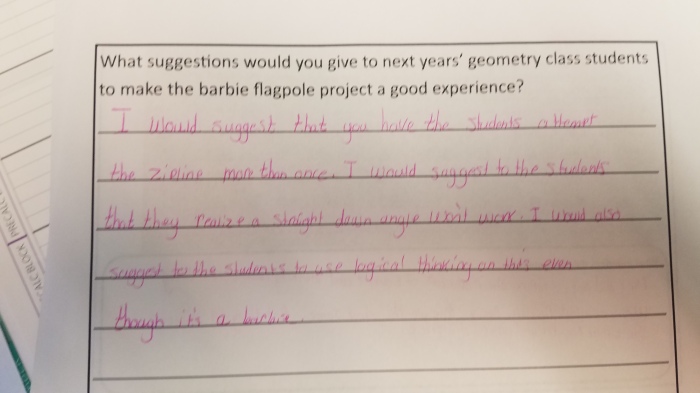
Eric made a sheet for students to reflect on the lesson.
Students sat with their partners from Barbie zipline day 1 and we begin by reviewing the scenario and their calculated flagpole height.
Next we discussed how this zipline will work. I used a string and a binder clip to make a model zipline, using a very steep slope for the zipline and I asked students to predict what would happen if Barbie came down a zipline like this. They agreed that she would fall too fast and get hurt. Next, I held the string almost horizontal and asked how this zipline would work – and students agreed that she would get stuck or mover too slowly.
I explained that the goal for this day is to use a model in class to determine a plan for Barbie to zipline down safely from the top of the flagpole. By the end of class, students had to know what angle of elevation they planned to use and how far from the base of the flagpole they needed to place the end of the zipline.
This day felt a little chaotic, but students did end up finding errors in their measurements by verifying their calculations in a variety of ways. The worksheet belowincorporated a range of geometry topics including:
Pythagorean Theorem
right triangle trigonometry to calculate lengths
inverse trigonometric functions to determine angles
similar triangles
Tomorrow, we test our calculations outside on the the flagpole.
I have seen posts about Barbie zipline on occasion over the past few years. I’ve avoided the lesson because it seemed like a lot of advance prep work and typically I don’t allow enough time plan this far ahead and work through constructing a zip line trial run to make sure it all works in advance. To keep it completely real, I also hadn’t seen any description or resources that I thought would fit my classes well. But I found myself approaching the end of a right triangle unit in geometry with 2 full block periods mapped on my unit plan labeled “Right triangle synthesis project – need to create.”
This is my first semester with a full time apprentice teacher,Eric, so I have help and some new motivation to make this a fun project for everyone this time too. This time of the school year, with short days, cold temperatures and no end in sight, it seems a lot of students appear pretty bored with school and many of the staff here are also struggling. I really just needed to lighten things up for the students and myself. The next logical thought: Queue Barbie and high quality pulleys.
We leaned heavily on Jed’s blog post and started with the activity guides included in his post, modifying them a little to incorporate his thoughts on how the lesson could be improved and our learning goals.
I like having students select a team name because it forces them to talk to each other before they being working with content. It increases collaboration and breaks down barriers with a safe opening topic for conversation.
Given the image below, use Mr. R to estimate the height of the flagpole. This led to students getting rulers and measuring on the image and a rich discussion on whether 4 inches is the same as 0.4 feet.
Discussion
Eric: What are some ways we could find the height of the flagpole?
student: climb up the flagpole?
student: find the angle?
Eric: What angle?
student: The angle of elevation?
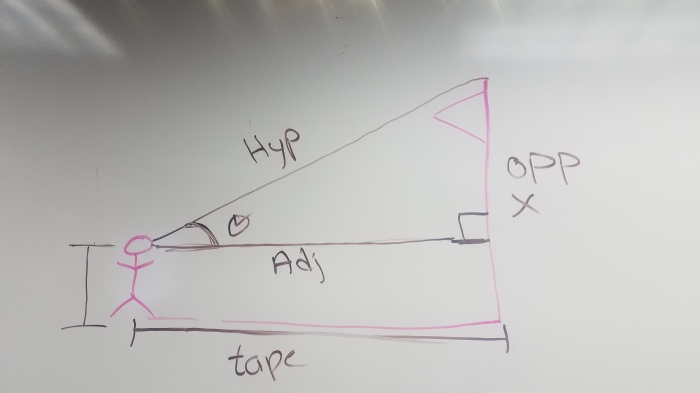
Eric: Where does the angle of elevation go (sketches diagram)?
student: Do we know how tall Ken is?
student: Are we Ken in this situation?
Eric: What can we measure?
student: You could measure the distance from the flagpole to the person.
student: We could use that angle tool thing that Mrs. B carries around.
student: oooohhhhhh. yeah.
Eric: How could we use that? What else would we need to measure? Would we all have the same measurements?
student: The adjacent!
student: The hypotenuse!
student: oh! So we could use tangent.
Eric: I want you to measure two different times, switching roles. Why do you think we should do it twice?
student: To see if we get the same answer?
Eric: Will we all get the same answer?
Student: No.
Eric Why not?
student: Because it is not exact, but they should be really close.
Eric: Work with your group and make a plan before we go outside.
4. Measure & Calculate
Outside measurements, then back in for calculations, using this sheet from Jed Butler’s description as a guide.
Favorite question while measuring angles outside:
student: Is it possible to get the same angle of elevation if may partner and I are different heights?
Eric: What do you think?
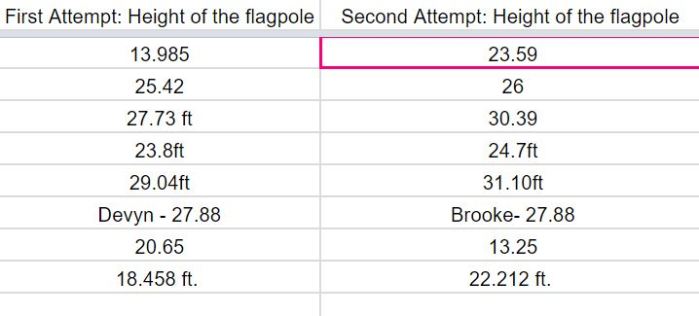
5. Enter both of your calculated flagpole heights into the google form (accessed using a bit.ly address from their cell phones).
6. Justify flagpole height
Project the spreadsheet from the google form as students enter their flagpole heights.
Eric: We don’t know the actual height of the flagpole. Here are all of your calculated heights. We need to determine what number to use as the height of the flagpole. What are some was to analyze data?
I adapted Jeff De Varona’s Diamond Building lesson into a 3-act task, but instead of having act 3 be a reveal of the actual height, I had students calculate the height a second way to confirm their results. It took 2 short class periods (about 40 mins each) with my struggling students, but it may be able to be completed in 1 class period if you spend less time noticing/wondering/developing questions. I had students work in randomly assigned groups of 2 or 3. They were engaged the entire time and seemed to enjoy the task.
I started by only providing sheets 1 and 2 at first & running it like a typical 3 act. Then I provided “diamond height method” info via projection & allowed students time to work using big whiteboards and share their conclusions. This activity was followed the next day by providing the pages 3 & 4 of the attached file and having students determine the building’s height by the “clinometer method” then discussion of actual height & sources of error.
I used this lesson as a summary to a unit on right triangles, a few days after doing a clinometer activity based on this. My favorite part was listening to students try to determine how to find the height of 1 diamond using only the fact that it is constructed of 2 equilateral triangles with sides length 7 feet. Some students constructed 30-60-90 triangles and used trigonometry, which is exciting because I did not explicitly teach special right triangles in this geometry class. Most students realized they could use the Pythagorean theorem.
I planned to allow 10 minutes for students to ask questions & make progress on the triangle pile up. They make everything into such a big deal. After a reassuring talk about how I am confident that they have a lot of tools in their math bag of tricks, students did realize they could do this. I pointed out and we discussed Standards of Math Practice 1, 5 & 6. I’m excited to learn that “tools” refers to math skills in addition to physical and virtual items (trig & Pythagorean theorem, for examples).
I had a student ask me why we were doing this and that this is not something that would occur in “real life.” I responded that the task itself is not the goal, but persistence, precision & practice using tools were the real objectives. Their reply was “Oh, that makes sense” and they got to work!
Once they were sold and digging in, they really got on a roll. I couldn’t stop them to move on to another activity, it was just so beautiful to see them patiently working.
[update 4/24: It appears that folks are coming to this site to find the solution to the trig pile up. I want to make sure you know that the colorful work of the student above has some errors and is not a correct solution. I would never post the real solution here, silly!]
Today we did our first Graphing Stories warm up & the students were very upset that we got rid of estimation180 I’m going to have to bring it back in a month or two. But, man did they need the practice graphing! It was a mess and totally worth it. I heard students asking if they really had to pay attention to the seconds and their lines were curved when the should have been. I knew we need the practice.
After that I reminded them of the importance of the Standards of Mathematical Practice and ranted about SMP 1: PERSEVERANCE and we had a great discussion of its value. then I gave them the Trigonometry Pile up and asked “what do you notice” we discussed how it looked messy and overwhelming, then we talked about why. Most students agreed it was too many triangles and too many numbers. I asked them to consider ways they could make it more manageable…they concluded that we should redraw each triangle as we work our way up. Many students asked for bigger copies of the activity, so I blew it up for them and made it lighter so that they can easily read their writing on it will share tomorrow.
My initial plan was to do the clinometer activity tomorrow, but so many students were in a bit of a panic over this task that decided to allow them time to work in class tomorrow with my support. I’ll have to save the clinometer activity for another day.
I printed the questions on cards and gave a set to each group to encourage collaboration. I just gave them to the students. No instruction, no fancy schmancy notes. They learned through struggling and did great!
I put together an elaborate plan today to complete a station activity practicing different types of right triangle trigonometry. Then, this morning before class, I talked to the students, and i listened. They told me that they needed more time & they had questions….I adapted. So today after our warm up, I provided students with a prioritized list of work to complete and I just helped them and let them manage their time as they needed. Some had an old project that they never finished and they were stuck, others needed trig practice. The vast majority 95% of the class worked all period on what they needed and were on task!
I learned quickly today that I was a little too ambitious in my pace. Students were great at determining opposite, adjacent, hypotenuse & selecting the appropriate trig function, but they really struggled at solving for the unknown side. Being that it was “What we’ve been doing Wednesday” I changed the warm up after my first class to practice this skill. Students worked on partner problems where the problems sided by side had the same answer, but they really had a hard time. Most of them only got about halfway. I changed plans, decided it is ridiculous to have a quiz on this tomorrow as we planned, and instead we will work more with this tomorrow. Text week I only have students on Tuesday & Wednesday, so I’ll get to incorporate a day of angles of elevation and depression before having a quiz on Wednesday. I don’t want to rush, I want them to really learn trigonometry.
This is a challenge of being at a new school. I’m pretty good at anticipating areas where students get stuck, but occasionally, I get caught off guard. Next year I’ll be prepared for that one.