I Cannot Think When Cheetos are Present

I wanted to make a quick post to remind my future self how the Mathalicious lesson Cheese that Goes Crunch went this school year & how I should adapt it for the future.

The purpose of this activity is to have students develop a method to relate cheesiness to the non-cheesy portion of a crunchy vs puffy Cheeto in order to develop a measurement of which is cheesier & by how much. It is a realistic application comparing surface area to volume.

I have 3 sections of geometry, so I attempted this lesson 3 times, each a little differently – and I’d do this lesson again next year, but with more changes.

In my first class I made a fatal error – I distributed cups to the students and then ran around the room with a giant bag of Cheetos pouring them into each cup. This turned the class into a party. Students sat with Cheetos while not working on anything. BIG MISTAKE. When I tried to engage the class in the lesson there was little buy in or understanding of the goal of this activity and I ended up dragging my class through each component of the activity. While it was completed in the end, it was not understood by students.

Capture

For my next two classes, I set up cups with crunchy & puffy Cheetos in advance and set them out of sight. I introduced the activity and had good discussion and student ideas of which type of Cheeto was more cheesy and why. I didn’t provide them with Cheetos until they had a plan for determining which one was more cheesy and they concluded that the cheese was around the exterior, so the needed to compare surface area to volume.

I also found it pretty amusing how many students felt the need to organize their Cheetos:

2015-04-09 09.40.11 2015-04-09 09.42.54

Overall the activity was a great way to have students apply volume and surface area to a context. Next year I will make this task run more like a 3 act and less like a guided worksheet. I don’t want to tell the students what to think and when. It’s too helpful to tell them to approximate each Cheeto as cylinder and guide them to find the surface area and then the volume, and then find a ratio. Students don’t have the same degree of curiosity and satisfaction compared to them deciding what they need to do themselves.

This lesson took one 45 minute class period, but If I make these adaptations for next year It will most like take two: One period for the initial student question development and calculations and a second for student presentations and possibly time for them to improve or reflect on their work. OR maybe a gallery walk and whole class discussion.

I’ll adapt it like this next year:

Act 1 will beg the question of which type Cheeto has more cheese flavor. I will work through a notice/wonder and develop a main question.

Act 2 will be students determining what information they needed and equating a serving of crunchy Cheetos to puffy Cheetos. Then finding the volume and surface area of an average Cheeto and developing and justifying a method to measure cheesiness.

Act 3 will include student presentations of their analysis effectively sequenced as described in the 5 Practices book and maybe a reveal of how much more cheese powder per volume there are in crunchy vs puffy Cheetos (although this may not be necessary).

This task is a great idea and is worth doing with students. I think I struggled with its implementation because I did not develop enough student buy in and understanding of the question from the start – which I continue to be reminded is a critical component to successful student problem solving.

Introducing Surface Area with Pop Box Design

After sharing this activity on last nights Global Math Department meeting (recording here), I thought I should also post it here.

I came across the Pop Box Design task developed by Timon Piccini and knew it would be a good fit for my students.

My students needed to understand surface area, not just be able to use formulas. I’m proud that during this activity I didn’t say surface area once.

I started by playing Timon’s Act 1 of this task and allowing time for students to notice & wonder about the short video. Then students predicted which box uses less cardboard (lower left of board).

2015-03-04 10.18.40

We spent the remainder of the period playing with cm cubes and reviewing the meaning of and difference between surface area & volume using the worksheet attached in Timon’s 3 act.

2015-03-17 05.56.12 2015-03-17 05.56.23

The next class, I provided 12 pack boxes of each shape and put them in students hands, asking again – Which one uses more cardboard?

2015-03-16 14.30.442015-03-16 14.31.03

Students grabbed rulers and got to work finding area. They asked if they should be using inches or centimeters. I responded by asking which one requires more cardboard?

2015-03-16 16.13.532015-03-16 16.13.45

Once students determined the amount of cardboard used for each box, they logged into Google Classroom and wrote a letter to either soda box manufacturer or to me sharing their work, conclusions & recommendations:

letter1 letter2 letter3

The Good

  • Using Google Classroom to manage letters & provide feedback. Students are still revising their letters.
  • Illustration of surface area, we’ve referred back to this as we dug deeper into more advanced surface area problems.
  • Physically touching & measuring the boxes increases buy in, engagement & understanding.

Change for next time

  • Work with the class to develop a list of key elements to include in the letter.
  • Some facts on cost of cardboard, ink, production & environmental impacts to increase relevancy.
  • Improve connection between cubes & cardboard task. Some students did not see how these were related.

This task was a good, efficient way to ensure that students understand what surface area means and not just develop their ability to calculate surface area. As we practiced more advanced surface area problems, students were more understanding of what they were doing and was better able to develop formulas to find surface areas of a variety of  solids.

The Diamond Building

I adapted Jeff De Varona’s Diamond Building lesson into a 3-act task, but instead of having act 3 be a reveal of the actual height, I had students calculate the height a second way to confirm their results. It took 2 short class periods (about 40 mins each) with my struggling students, but it may be able to be completed in 1 class period if you spend less time noticing/wondering/developing questions. I had students work in randomly assigned groups of 2 or 3. They were engaged the entire time and seemed to enjoy the task.

I started by only providing sheets 1 and 2 at first & running it like a typical 3 act. Then I provided “diamond height method” info via projection & allowed students time to work using big whiteboards and share their conclusions. This activity was followed the next day by providing the pages 3 & 4 of the attached file and having students determine the building’s height by the “clinometer method” then discussion of actual height & sources of error.

I used this lesson as a summary to a unit on right triangles, a few days after doing a clinometer activity based on this. My favorite part was listening to students try to determine how to find the height of 1 diamond using only the fact that it is constructed of 2 equilateral triangles with sides length 7 feet. Some students constructed 30-60-90 triangles and used trigonometry, which is exciting because I did not explicitly teach special right triangles in this geometry class. Most students realized they could use the Pythagorean theorem.

2015-03-04 06.28.132015-03-04 06.16.07  2015-03-04 06.33.33

Day 117: File Cabinet! Finally! fun!

Our state testing starts tomorrow, I had a lot of goals I wanted to communicate to students before they jumped into these assessments:

  • Remind students that they are capable of solving problems, even when it has not been explicitly taught.
  • Intro to surface area, its coming up soon.
  • Build, confidence, success and curiosity about mathematics.

[update 3/14: This sheet and other 3 act math resources can be found here.]

photo 1 photo 2 photo 3

I want more time!!! Surface area & volume projects galore!

2014-04-09 10.30.07

There are too many projects that I want to incorporate for teaching surface area and volume. I’m not sure yet how to pick and choose and adapt to best meet my students needs. Please share other good projects in the comments! I am writing this blog post as a way to list options for future reference:

Surface Area

Lisa Bejarano: Interactive notes

Mr. Stadel: File Cabinet
Kaplinsky: Foil Prank
Miss Calcul8: Tin-Man Project
Volume:

Engaging Math: Volume of a Pyramid
Tap into teen minds: Prisms & Pyramids, a 3- act task
Fawn & NCTM: I am a Doughnut
Kaplinsky: Gumball Machine
Kaplinsky: Drug Money
Kaplinsky: Cigarette Butts
Yummy Math: Penny Wars
Dan Meyer: You Pour I choose
Dan Meyer: Meatballs
Dan Meyer: Water Tank
MARS: Calculating volumes of Compound objects
Open Middle: Find 3 different cylinders that hold between 110 and 115 cu. ft. of water.
Fawn: Listerine to Fuji water
Both Surface area & Volume:

Mathalicious: Canalysis
Kate Nowak: Spiky Door
Piccini: Pop box Design & my post on how it went
MARS: Evaluating statements about enlargements
MARS: Designing Candy Boxes
Mathalicious: Cheese that goes Crunch with these adaptations

Day 88: Taco Cart! Woo Hooo!

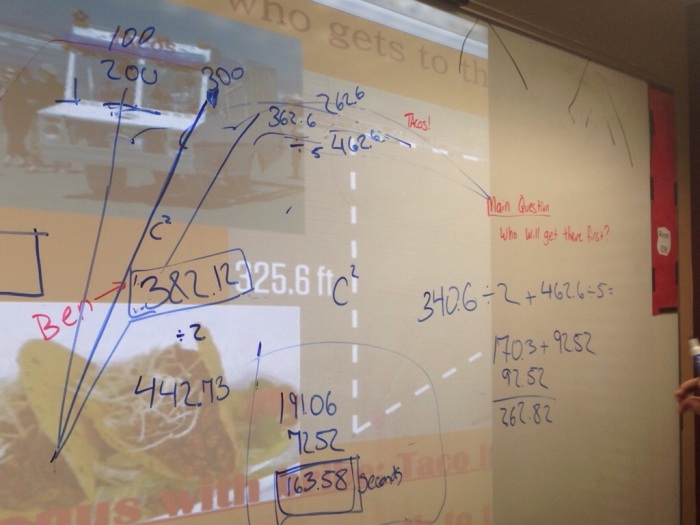
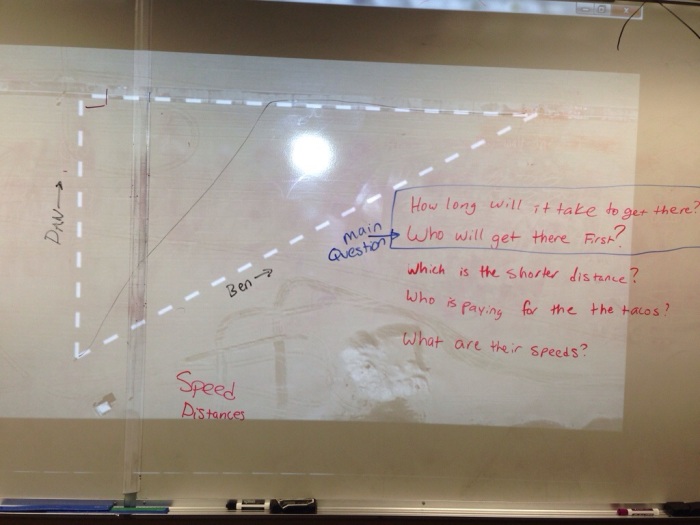
My favorite part of the intro to Taco Cart is when I asked students what information they needed, I’ll only tell them 2 things, and they debated for about 5 minutes. A few students thought the weather would be a factor. Their peers were furious. They decided the distances are more important. We only got started. Tomorrow they will figure it out.  20140121-115357.jpg

20140121-115505.jpg